React
Setup
Add the client to your dependencies:
npm i react-tggl-clientAdd the provider to your app:
import { TgglClient, TgglProvider } from 'react-tggl-client'

// Instanciate it outside of your component
const client = new TgglClient({ apiKey: 'YOUR_API_KEY' })

const App = () => {
  return (
    <TgglProvider client={client}>
      {/*...*/}
    </TgglProvider>
  )
}
For server-side-rendering you can pass the list of flags directly to the client via a custom storage:
const client = new TgglClient('YOUR_API_KEY', {
  storages: [{
    get: () => ({
      flagA: null,
      flagB: 'foo',
    }),
    set: () => null,
  }],
})
Read the Node.js client documentation for more client specific information like polling, caching, and using the proxy.
Updating the context
You can now change the context anywhere in the app using the useTggl hook:
import { useTggl } from 'react-tggl-client'

const MyComponent = () => {
  const { user } = useAuth()
  const { updateContext } = useTggl()

  useEffect(() => {
    if (user) {
      updateContext({ userId: user.id, email: user.email })
    } else {
      updateContext({ userId: null, email: null })
    }
  }, [user])

  return <></>
}
updateContext only updates the keys you specify, it merges the context you pass as argument into the existing context. Alternatively you can use setContext to override the context completely.
Checking flag results
Use the useFlag hook to get the state of a flag:
import { useFlag } from 'react-tggl-client'

const MyComponent = () => {
  // Use default value 42
  const value = useFlag('myFlag', 42)

  //...
}
Typing
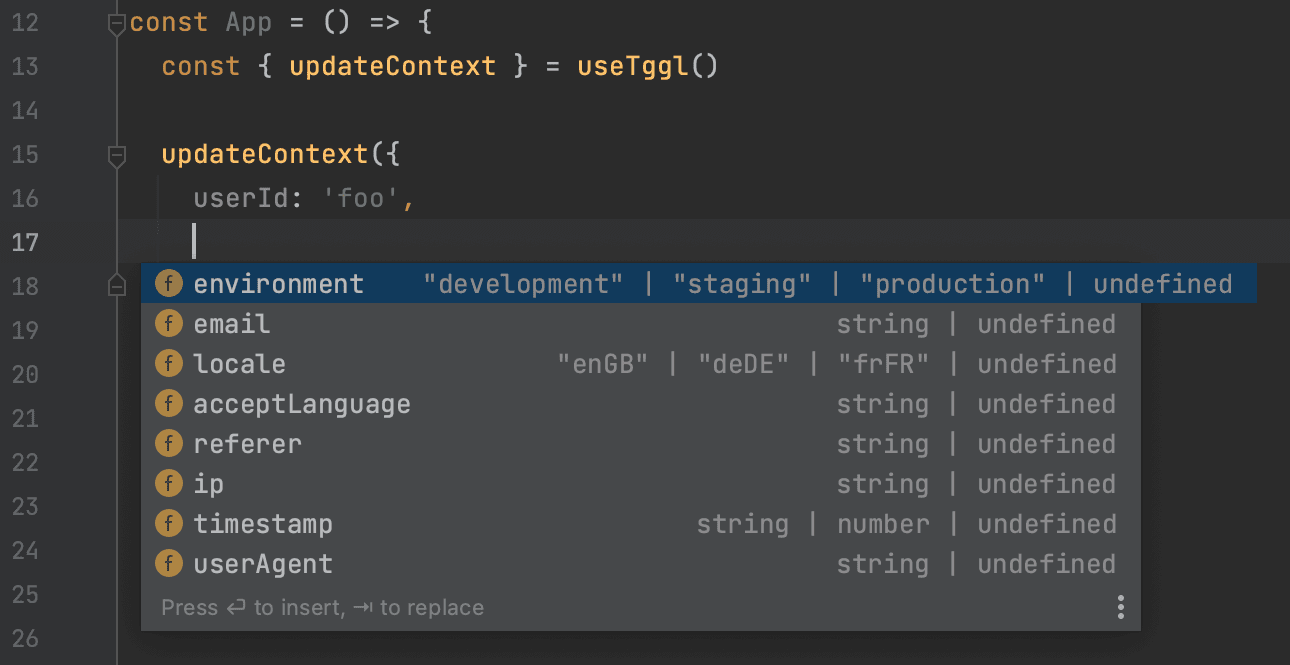
Using the Tggl CLI you can run an introspection query to generate the TypeScript types for your flags and context.
npm i --save-dev tggl-cli
tggl typing -k <SERVER_API_KEY> -o src/tggl.d.ts -p react-tggl-client
Replace <SERVER_API_KEY> with your server API key or use the TGGL_API_KEY environment variable and omit the -k option. You should run this command everytime you need to update the typing. Your IDE will now autocomplete and type-check the context properties and all flag names and values.
Tracking flags evaluation events
Tggl works nicely with your already existing analytics tool. You can track all flag evaluation events in one place and forward it to your analytics to compute conversion rates for A/B testing.
const App = () => {
  return (
    <TgglProvider
      client={client}
      onFlagEval={({ slug, value }) => {
        trackEvent('Flag evaluated', { slug, value })
      }}
    >
      {/*...*/}
    </TgglProvider>
  )
}
Amplitude
If you are using Amplitude, tracking is automatic, you don't need to do anything. Just make sure the Amplitude SDK is available on window.amplitude. [Tggl] Flag evaluated events will be sent to Amplitude with slug and value.
If you are importing the Amplitude SDK via a <script /> tag, you do not need to do anything. If you are using npm, you need to expose the amplitude object to the window object like so:
import * as amplitude from '@amplitude/analytics-browser';

window.amplitude = amplitude
Intercom
If you are using Intercom, the SDK will automatically track flags values for each user in custom data attributes. You simply have enabled the Intercom integration and choose which falgs to track. Just make sure the Intercom SDK is available on window.Intercom.
If you are importing the Intercom SDK via a <script /> tag, you do not need to do anything. If you are using npm, you need to expose the Intercom object to the window object like so:
import Intercom from "@intercom/messenger-js-sdk";

window.Intercom = Intercom
Managing errors
You can listen to network errors using the onError prop of the provider:
const App = () => {
  return (
    <TgglProvider
      client={client}
      onError={(error) => console.error(error)}
    >
      {/*...*/}
    </TgglProvider>
  )
}
You can also use the useTggl hook to get the last error that occurred:
import { useTggl } from 'react-tggl-client'

const MyComponent = () => {
  const { error } = useTggl()

  //...
}
Waiting for the client to be ready
You can use the useTggl hook to get the current "readiness" state of the client:
import { useTggl } from 'react-tggl-client'

const MyComponent = () => {
  const { ready } = useTggl()

  //...
}