Environments
Overview
This section explains how to integrate development environments with Tggl and use them in your segmentation to enable features based on if the user is in production, staging, or local development environments.
You are not limited in the number of environment you can have and can very easily switch or share logic between environments.
It is also important to note that environments are set for each project, meaning that you can have a completely different set of environment between your web application and your iOS or Android app.
Setting up your environments
By default, each project comes with three environments:
productionstagingdevelopment
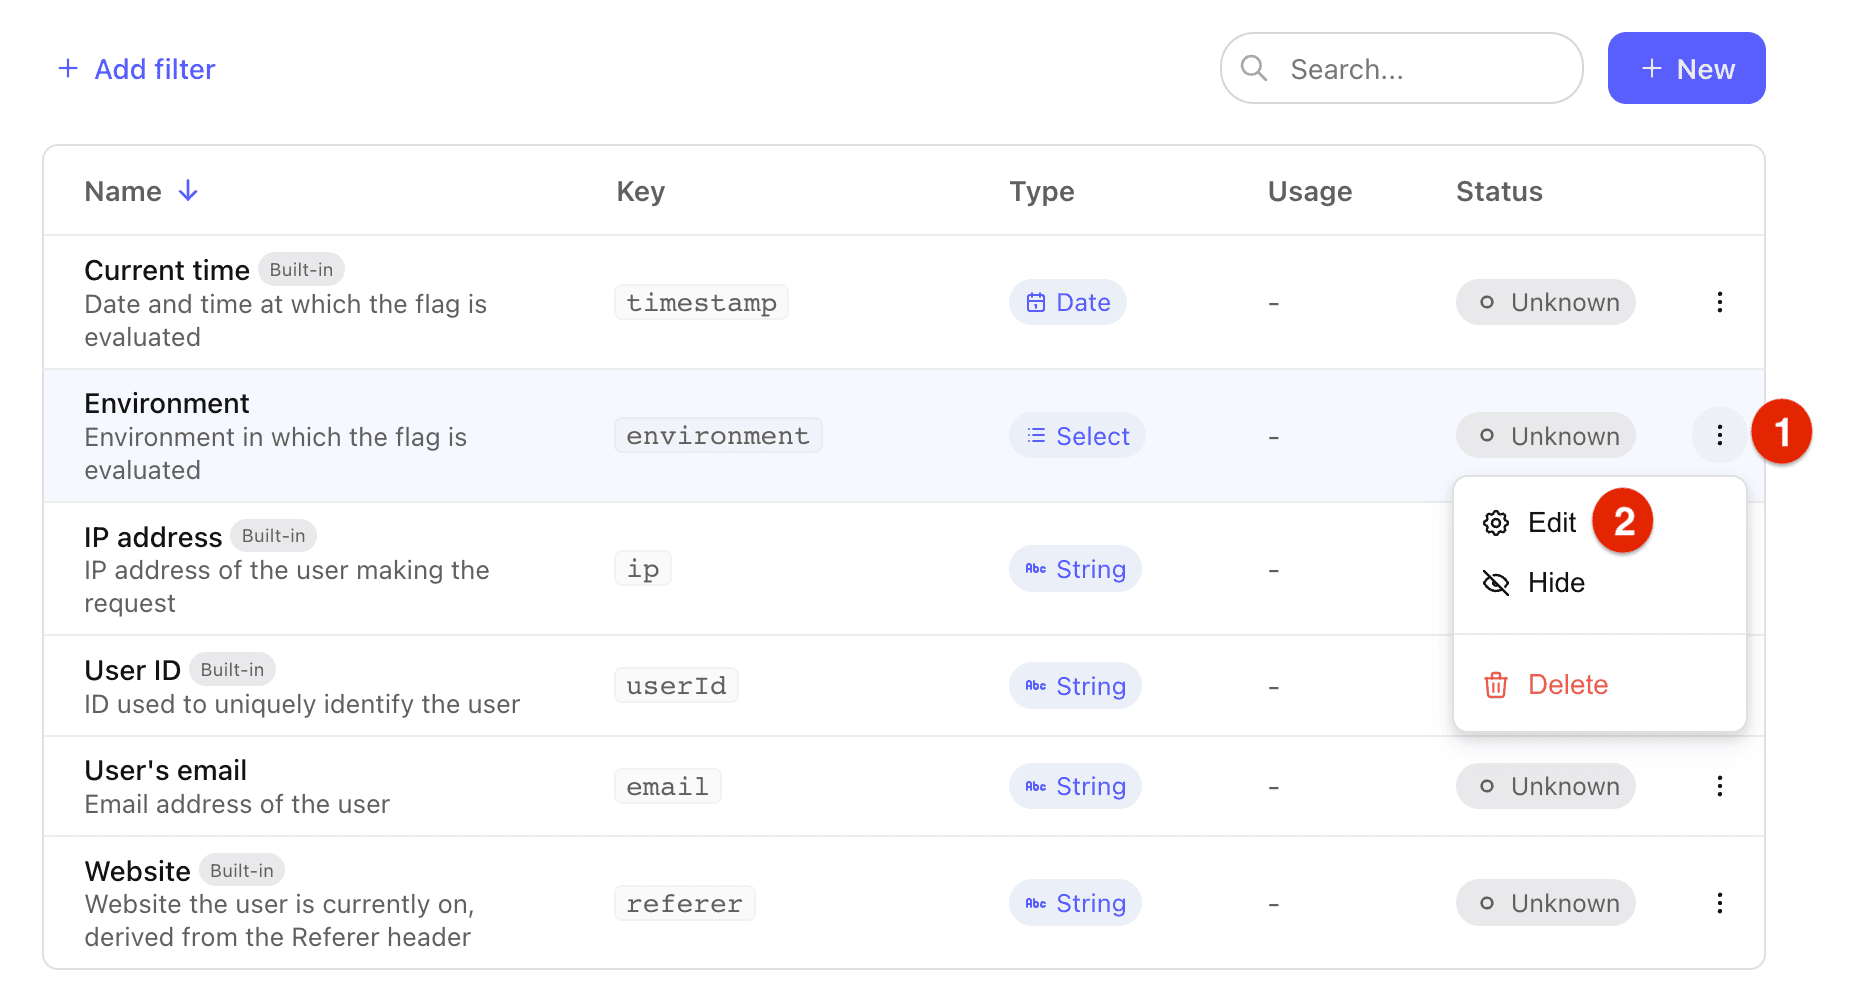
If you need to add or rename environments to fit you existing workflow, start by selecting your project in the upper left corner and go to the context menu.
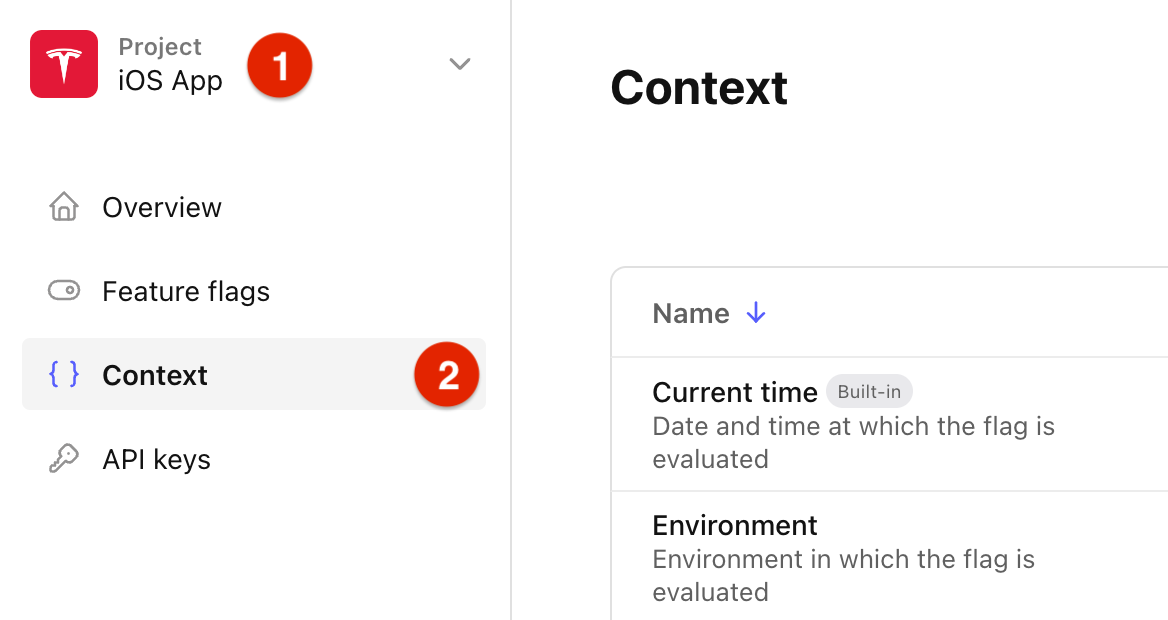
Edit the Environment property to add / rename environments as needed and hit Update.
Passing the environment from your code
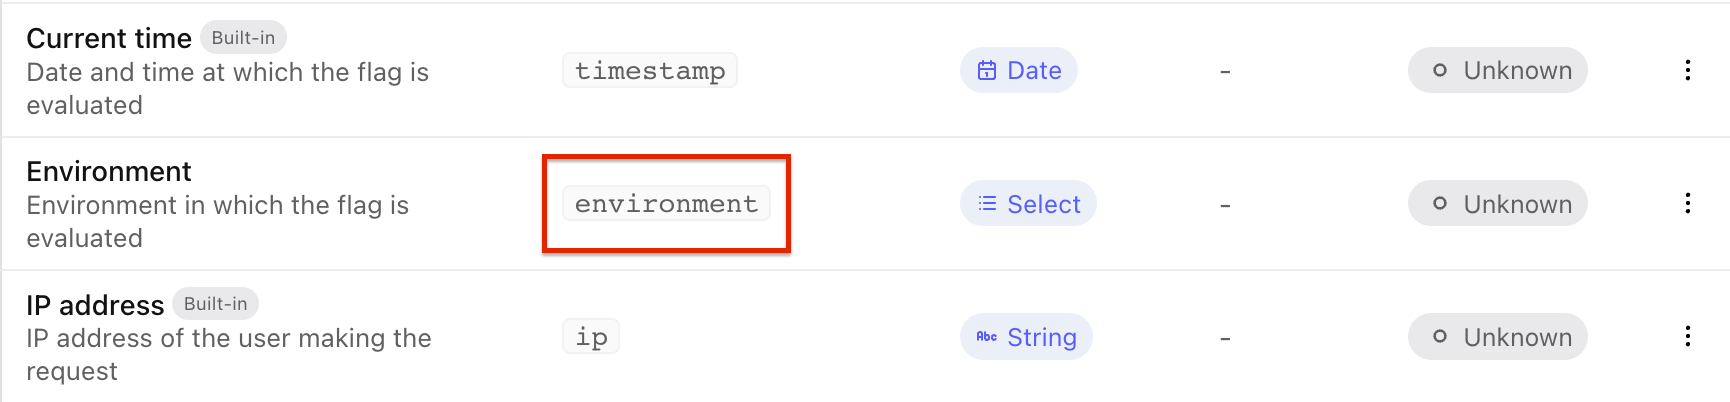
On your Tggl dashboard, you can see that the key you should use is environment.
Then, in your code, simply pass the environment as a context key. For Node.js this might look something like this:
await client.setContext({
  environment: process.env.environment,
  // Other context properties like userId, email...
})
How to enable features for specific environments only?
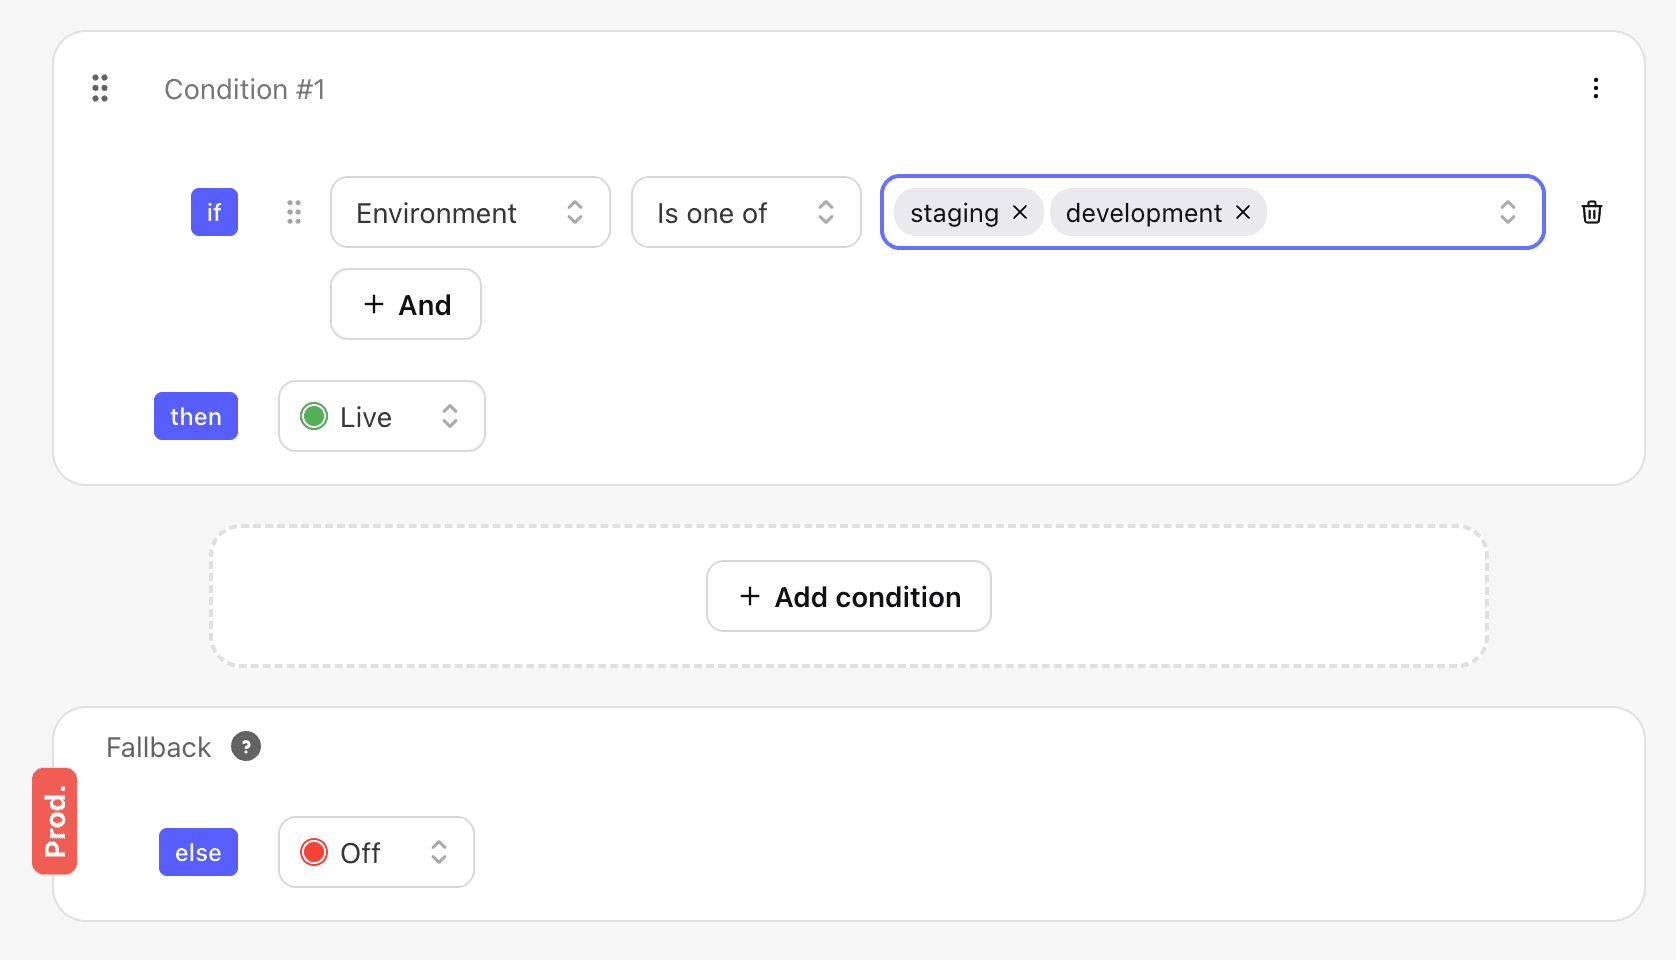
Create a feature flag and use the environment in your conditions to enable it for specific environments only. Here we enabled the feature only for the staging and development environments:
The production environment
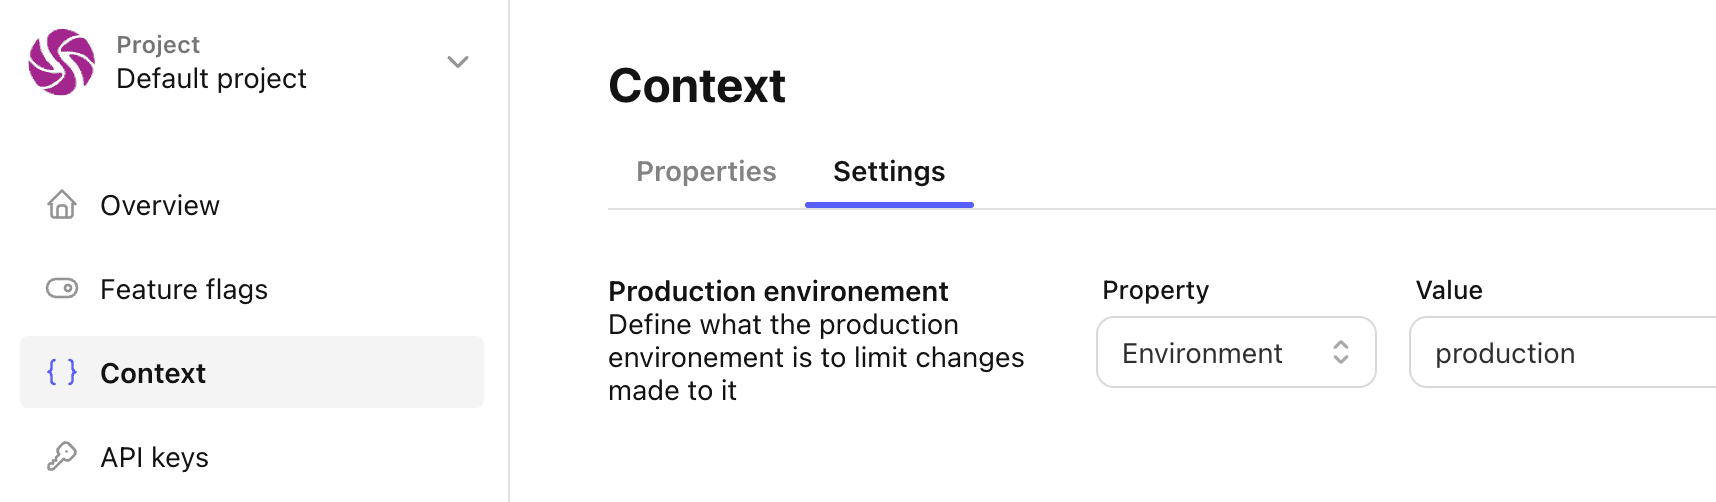
The production environment should be treated differently from the others since it impacts real users. In your dashboard, go to Context > Settings and set the production environment. By default, it is set as production when the property Environment is equal to production but you change change it to match your own conventions.
Now that the production environment is setup, all flag conditions that impact production with be marked by a red "production" badge to help you identify them quickly:
Here, modifying condition #1 will have an impact on production, but modifying condition #2 or the fallback will not. You can use this to give specific editor rights to users based on this badge.
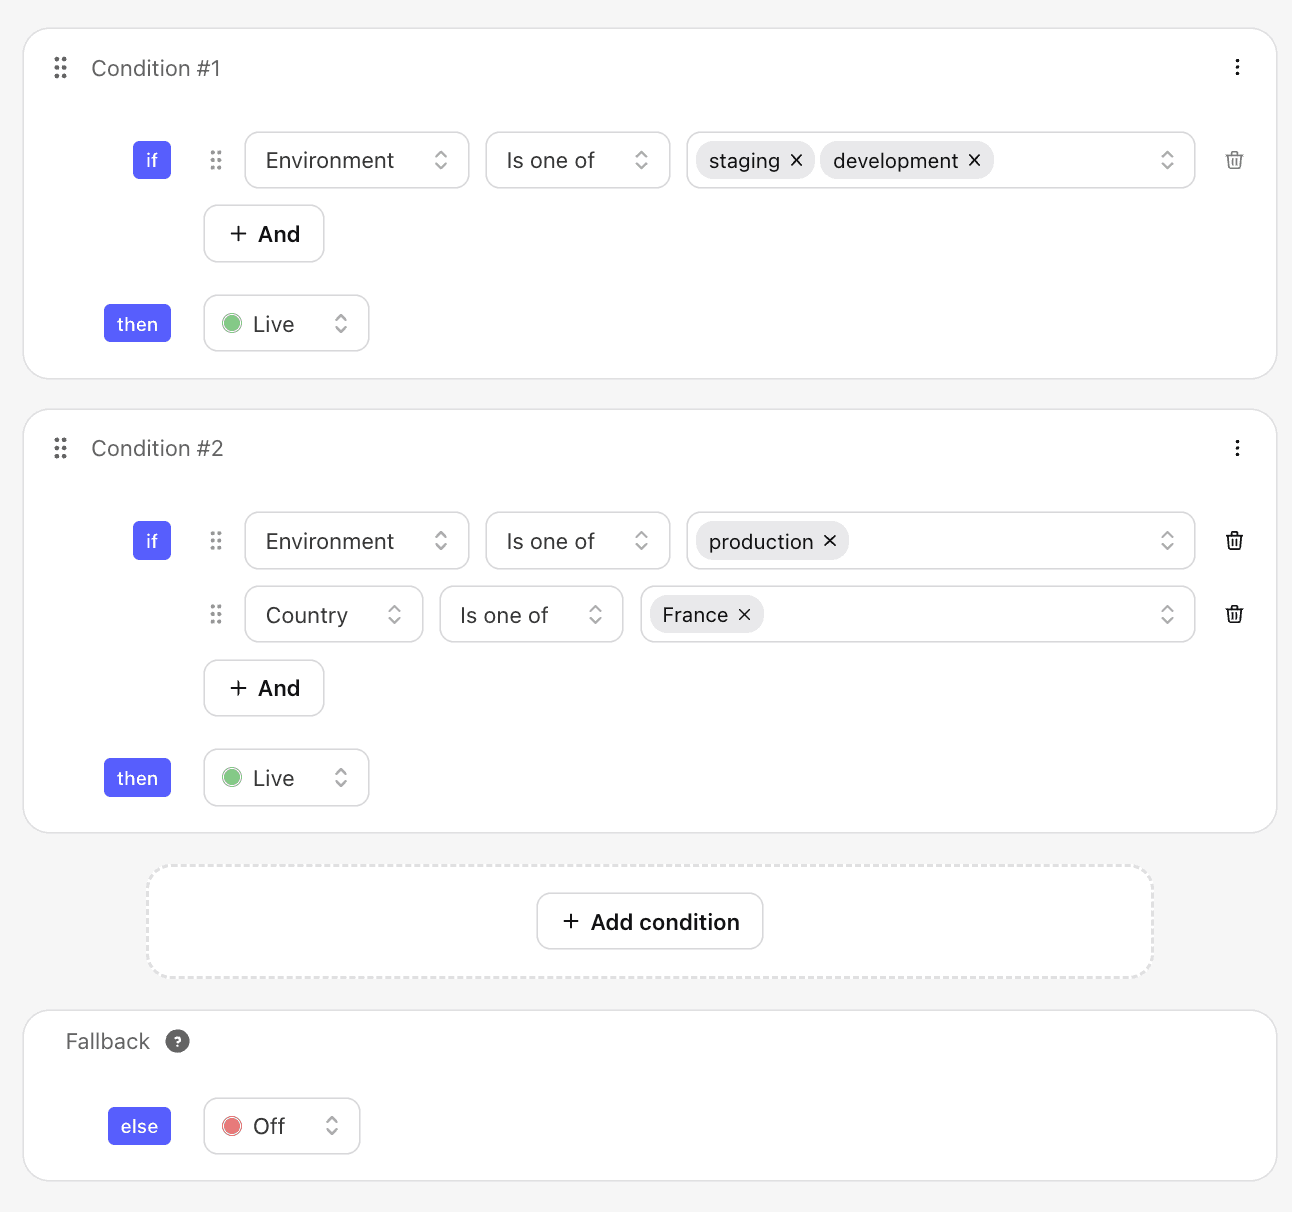
How to conditionally enable features based on the environment?
You can add complex logic to you feature flag's conditions. In this example we enabled the feature for all users for development and staging, and only enabled it for France for production.